
Master Mechanic: Using Jumper Cables on Your Car Battery
Murphy’s Law states, “anything that can go wrong, will go wrong.” While that may sound a little bleak, any Master Mechanic will tell you that it does hold some merit when it comes to car maintenance.
At their core, cars are sophisticated machines with many systems working in-sync seamlessly to get the desired effect: movement! With modern computer integration, vehicles are great for monitoring and self-diagnosing their internal issues, but some problems are impossible to foresee, even for a Master Mechanic. Many people are quick to assume that we must be referring to more complex issues, but it’s actually the opposite. You’ll know what we’re talking about if you’ve ever had a flat tire, chipped windshield, or a battery die out of the blue. No computer chip can help with the cards life deals sometimes.
You can be prepared though. We asked a Master Mechanic what to do the next time you’re stuck with a dead battery and a car that just won’t start. Here’s our guide to safely boosting a car using jumper cables. Oh, and please do remember to keep jumper cables in your car!
Using Your Jumper Cables To Boost Your Car Battery:
1) First, you’ll need to find a vehicle and a friendly driver to help you out! Once you do, make sure the booster vehicle is parked close enough to your car. It’s important to keep them close enough that the jumper cables reach both batteries, but not close enough that they’re touching.
2) Next, you’ll want both cars turned off. Put both cars in park–or neutral if you’re dealing with a manual transmission. Pull up the parking brake on each vehicle and ensure that the car is using no power, including accessories and lights. Unplug anything that’s hooked up to your USB ports, too, including cell phones or your GPS.
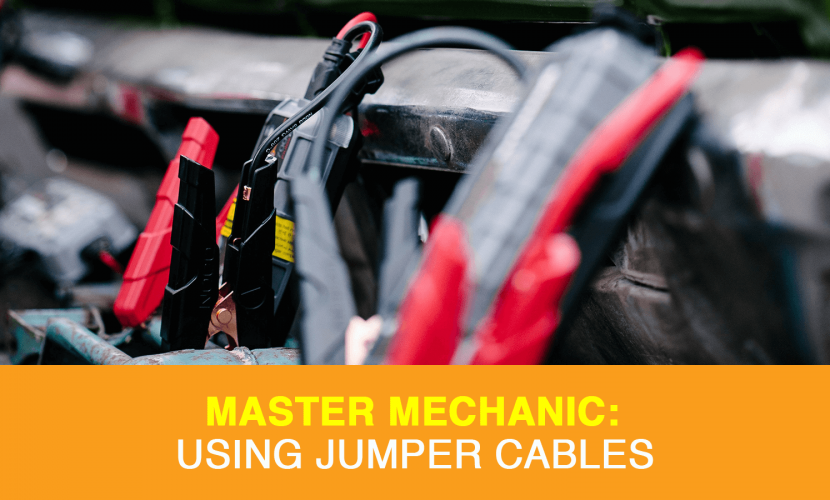
3) Before you proceed, check to make sure the jumper cables you’re using are clean and in working order. Before connecting the jumper cables, it’s also best to wear protective eye equipment and safety gloves.
4) Check the battery in the dead car before attaching any cables. Is the battery cracked or leaking? If it is, stop. You should NEVER try to jump a damaged battery, or you could risk triggering an explosion. A cell in this condition calls for an immediate replacement, and your local Master Mechanic is happy to help.
If there’s only corrosion on the terminal bolts, simply wipe them clean while wearing protective gloves and make sure that the clamps are able to make direct contact (metal on metal).
5) It’s time to connect the batteries! Start by connecting the positive end of the jumper cables (which is usually red) to the positive terminal (“+” sign) on the battery that’s dead. In most cars, the battery’s positive terminal is larger than the negative terminal and often has a cover.
6) On the charged car, attach the negative end of the cable (which is usually black) to the negative battery terminal (“-” sign). Connect the other end of the negative cable to an unpainted metal surface on the engine of the dead car. You can use an unpainted bolt or bracket that is as far from the dead battery as possible. Doing this will ground the current and reduce the possibility of igniting the hydrogen gas that the car battery produces.
IMPORTANT: You need to ensure that the last jumper connection made is to the dead battery, not the live battery on the booster car.
7) Without touching the wires, check that the jumper cables are connected securely to the battery and that the cables aren’t dangling near any engine parts in either of the vehicles.
8) Once you double, and triple check the cables, start the booster car and let it idle for a few minutes while your car begins to charge. The charge time for you battery depends on how dead it is. If it’s an old battery that’s been dead for over a month, the boost process could take a little while. If your battery is new and dead because you left the lights or accessories on, then the battery shouldn’t need much time to charge.
9) Next, it’s time to start the dead car and let both vehicles idle. If your car still doesn’t start, don’t push it or you could damage it further. At this point, something more serious is likely to blame, and it’s a good idea to contact your local Master Mechanic for help.
10) Once you’ve boosted the dead vehicle, remove the jumper cables in reverse order, watching that you don’t let the cables fall into the engine or allow the clamps to touch each other.
11) Disconnect the negative cable (which is usually black) from the engine block or the unpainted surface you used. Doing this will break the circuit and remove your risk of being electrocuted. Now unhook the other end of the negative cable (black) from the negative post (“-” sign) of the booster car battery.
12) Remove the positive cable (which is usually red) from the positive terminal (“+” sign) of the other car’s battery. The very last thing to do is disconnect the other end of the positive cable (red) from the positive post ( “+” sign) of your battery.
13) Before turning off the engine, drive your car to a safe location, like home or a mechanic. When you shut it off again, there is a chance you’ll have to boost it one more time to get it going, so don’t get stuck!
Safety Tips When Using Jumper Cables:
- Be extremely careful when working with any car battery. It has the potential to explode, and leaking chemicals can harm your skin.
- Wear protective equipment like gloves and goggles.
- Never smoke, light a match, or have any open flame around the battery.
- If you’re looking to purchase jumper cables, don’t cheap out. Master Mechanic has many reliable cables with well-insulated lamps and at least 8-gauge wire.
- Don’t let the cables touch each other. This can severely damage a car’s computer and charging system.
If you don’t feel comfortable doing this yourself, it’s not worth taking the risk. Call your local Master Mechanic and describe the issue. We’ll advise you on next steps and send someone to tow your car if necessary.